 Skip to content
 Understanding XAMPP and PHP Versions
If you are developing applications locally using XAMPP, knowing how to change the PHP version is crucial. Different projects may require different PHP versions, so having the flexibility to switch between them is essential for successful development.
Steps to Change the PHP Version in XAMPP
The process of changing the PHP version in XAMPP is straightforward. First, download the desired PHP version from the official XAMPP downloads page.
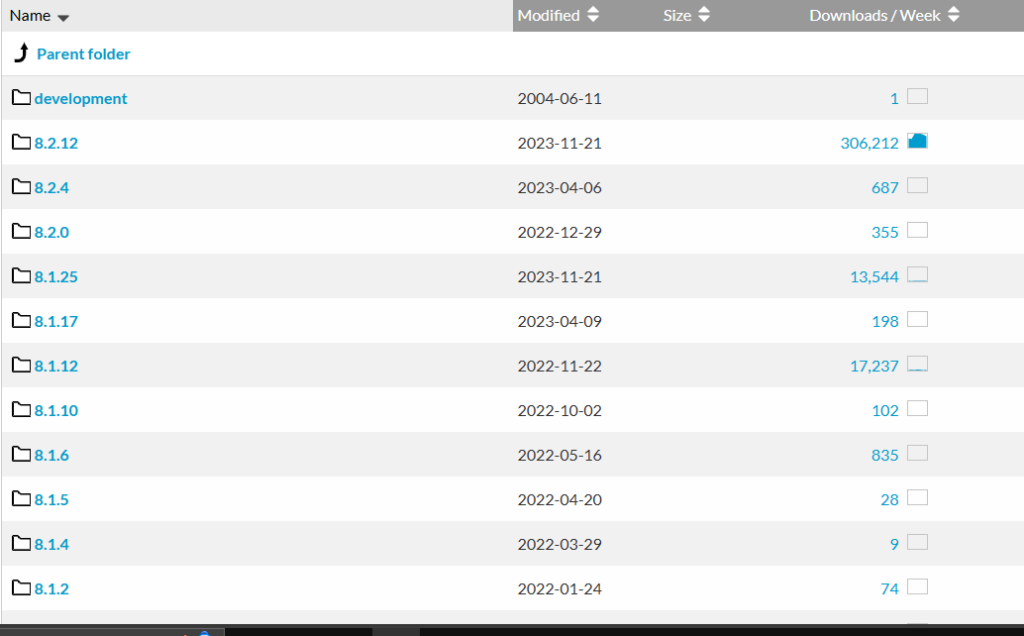
Select your operative system in XAMPP – Browse Files at SourceForge.net :
- Windows: XAMPP – Browse /XAMPP Windows at SourceForge.net
- Linux: XAMPP – Browse /XAMPP Linux at SourceForge.net
- Mac: XAMPP – Browse /XAMPP Mac OS X at SourceForge.net
It will redirect you to all of the PHP versions available for XAMPP, download the one that you require
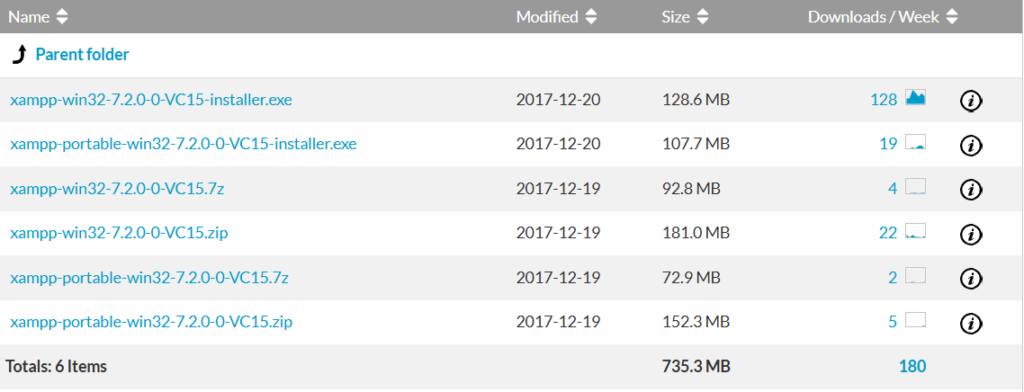
Click on the link for your right version, for example, 7.2.0 PHP version XAMPP – Browse /XAMPP Windows/7.2.0 at SourceForge.net
Select the ZIP folder, for example, https://sourceforge.net/projects/xampp/files/XAMPP%20Windows/7.2.0/xampp-win32-7.2.0-0-VC15.zip/download
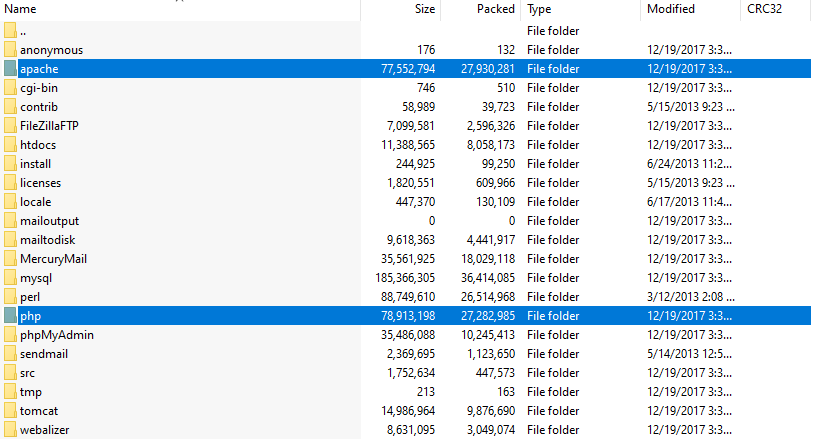
Wait until it finishes downloading and unzip the file, we will extract only the Apache and PHP folders, these folders are the only ones required to change the version in Xampp
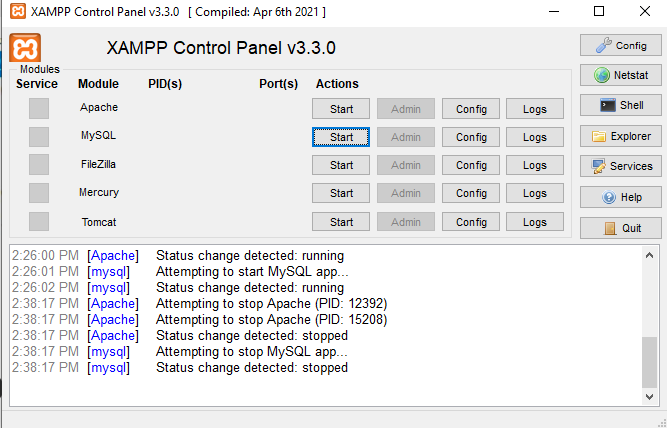
Now, open XAMPP and ensure that all of the services are down
Click in the explorer folder and rename the Apache and php folders to oldversion so they won’t be deleted.

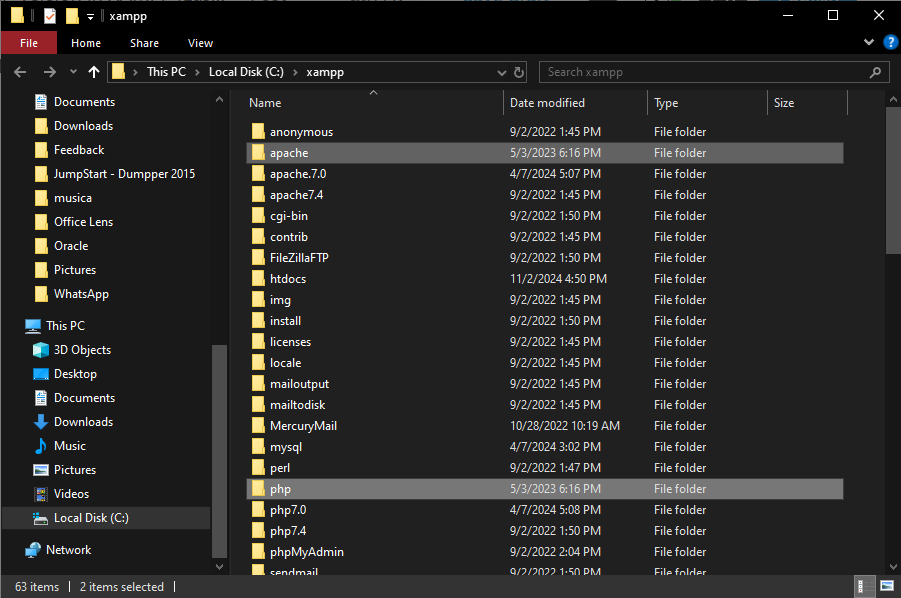
Finally, paste here the two folders extracted from the ZIP that we downloaded it, the PHP and apache.
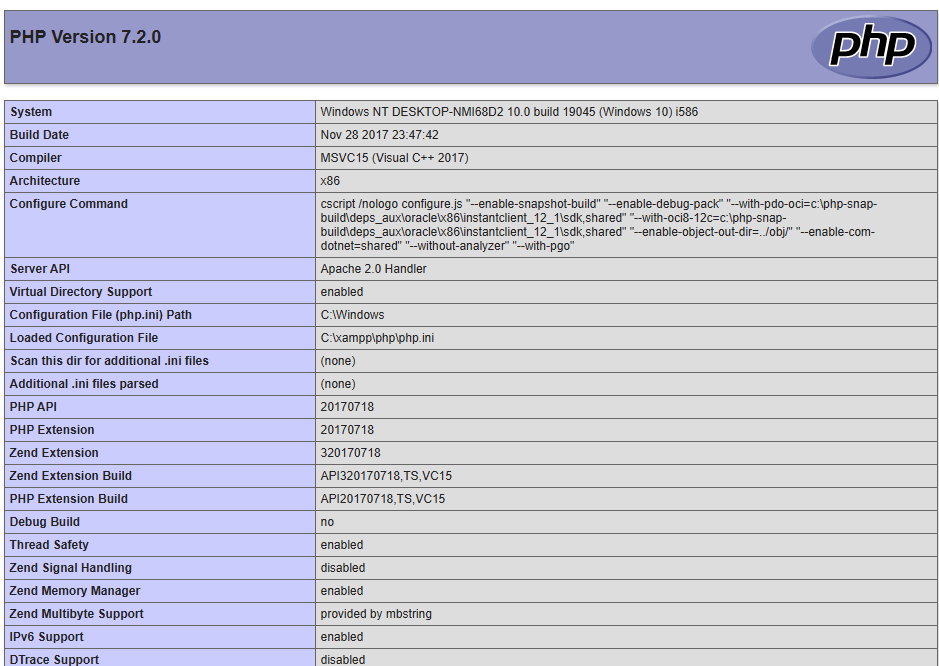
Turn on the Apache server and click admin

Then, select php info in the navbar

And ensure that the PHP version is the correct one
Thank you, please feel free to comment or to ask for more tutorials 🙂


Pingback: Creating a Laravel 11 Web Page with React JS Using Only Node JS
I am often to blogging and i really appreciate your content. The article has really peaks my interest. I am going to bookmark your site and keep checking for new information.